1. 安装CODE
首先更新升级Ubuntu系统:
sudo apt update
sudo apt upgrade -y
sudo apt update
sudo apt upgrade -y
导入 Collabora CODE 签名密钥:
cd /usr/share/keyrings && sudo wget https://collaboraoffice.com/downloads/gpg/collaboraonline-release-keyring.gpg
为 Collabora CODE 包存储库创建一个文件:
sudo nano /etc/apt/sources.list.d/collaboraonline.sources
输入存储库配置:
URIs: https://www.collaboraoffice.com/repos/CollaboraOnline/CODE-deb
Signed-By: /usr/share/keyrings/collaboraonline-release-keyring.gpg
Types: deb
URIs: https://www.collaboraoffice.com/repos/CollaboraOnline/CODE-deb
Suites: ./
Signed-By: /usr/share/keyrings/collaboraonline-release-keyring.gpg
Types: deb
URIs: https://www.collaboraoffice.com/repos/CollaboraOnline/CODE-deb
Suites: ./
Signed-By: /usr/share/keyrings/collaboraonline-release-keyring.gpg
安装 CODE 包:
sudo apt install coolwsd code-brand -y
sudo apt update
sudo apt install coolwsd code-brand -y
sudo apt update
sudo apt install coolwsd code-brand -y
2. CODE的配置
在将 Collabora 与 NextCloud 实例连接之前,我们需要执行以下命令:
sudo coolconfig set ssl.enable false
sudo coolconfig set ssl.termination true
sudo coolconfig set ssl.enable false
sudo coolconfig set ssl.termination true
sudo coolconfig set ssl.enable false
sudo coolconfig set ssl.termination true
上述命令用于禁用 TLS,因为服务无法找到证书文件。我们稍后将启用这两个设置。
接下来是允许连接到您现有的 Nextcloud 实例,使用以下命令使用 Nextcloud 域:
sudo coolconfig set storage.wopi.host 你NextCloud网址
执行该命令后,您应该收到以下输出:
root@host:~# sudo coolconfig set storage.wopi.host 你NextCloud网址
No property, "storage.wopi.host", found in config file.
Adding it as new with value: "你NextCloud网址"
Saving configuration to : /etc/coolwsd/coolwsd.xml ...
root@host:~# sudo coolconfig set storage.wopi.host 你NextCloud网址
No property, "storage.wopi.host", found in config file.
Adding it as new with value: "你NextCloud网址"
Saving configuration to : /etc/coolwsd/coolwsd.xml ...
Saved
root@host:~# sudo coolconfig set storage.wopi.host 你NextCloud网址
No property, "storage.wopi.host", found in config file.
Adding it as new with value: "你NextCloud网址"
Saving configuration to : /etc/coolwsd/coolwsd.xml ...
Saved
完成后,设置 Collabora Online 管理员密码:
sudo coolconfig set-admin-password
您应该输入管理员用户名和强密码。
root@host:~# sudo coolconfig set-admin-password
Enter admin username [admin]: admin
Saving configuration to : /etc/coolwsd/coolwsd.xml ...
root@host:~# sudo coolconfig set-admin-password
Enter admin username [admin]: admin
Enter admin password:
Confirm admin password:
Saving configuration to : /etc/coolwsd/coolwsd.xml ...
Saved
root@host:~# sudo coolconfig set-admin-password
Enter admin username [admin]: admin
Enter admin password:
Confirm admin password:
Saving configuration to : /etc/coolwsd/coolwsd.xml ...
Saved
完成/etc/coolwsd/coolwsd.xml更改后,启动 Collabora 服务
sudo systemctl start coolwsd && sudo systemctl enable coolwsd
执行以下命令检查服务的状态:
sudo systemctl status coolwsd
您应该获得以下输出:
root@host:~# systemctl status coolwsd
● coolwsd.service - Collabora Online WebSocket Daemon
Loaded: loaded (/lib/systemd/system/coolwsd.service; enabled; vendor preset: enabled)
Active: active (running) since Thu 2023-06-22 06:27:10 CDT; 399ms ago
CGroup: /system.slice/coolwsd.service
└─3995 /usr/bin/coolwsd --version --o:sys_template_path=/opt/cool/systemplate --o:child_root_path=/opt/cool/child-roots --o:file_server_root_path=/usr/sha>
Jun 22 06:27:10 host.test.vps systemd[1]: Started Collabora Online WebSocket Daemon.
root@host:~# systemctl status coolwsd
● coolwsd.service - Collabora Online WebSocket Daemon
Loaded: loaded (/lib/systemd/system/coolwsd.service; enabled; vendor preset: enabled)
Active: active (running) since Thu 2023-06-22 06:27:10 CDT; 399ms ago
Main PID: 3995 (coolwsd)
Tasks: 1 (limit: 4557)
Memory: 1.1M
CPU: 390ms
CGroup: /system.slice/coolwsd.service
└─3995 /usr/bin/coolwsd --version --o:sys_template_path=/opt/cool/systemplate --o:child_root_path=/opt/cool/child-roots --o:file_server_root_path=/usr/sha>
Jun 22 06:27:10 host.test.vps systemd[1]: Started Collabora Online WebSocket Daemon.
3.Nginx 配置
安装Nginx:
sudo apt install nginx -y
为子域collabora网址创建一个新的 Nginx 配置文件:
sudo nano /etc/nginx/sites-available/你的collabora网址.conf
输入配置:
server_name 你的collabora网址;
server {
listen 80;
server_name 你的collabora网址;
}
server {
listen 80;
server_name 你的collabora网址;
}
启用 Nginx 服务器块配置:
sudo ln -s /etc/nginx/sites-available/你的collabora网址.conf /etc/nginx/sites-enabled
重新启动 nginx 服务:
sudo systemctl restart nginx
如果 UFW 防火墙处于活动状态,则打开端口 80 和 443:
sudo ufw allow 80
sudo ufw allow 443
sudo ufw allow 80
sudo ufw allow 443
为 Nginx 安装 Certbot:
sudo apt install certbot python3-certbot-nginx -y
为子域你的collabora网址请求 SSL :
sudo certbot --non-interactive \
-m admin@你的网址 \
--agree-tos \
--no-eff-email \
--nginx \
-d 你的collabora网址 \
--redirect
sudo certbot --non-interactive \
-m admin@你的网址 \
--agree-tos \
--no-eff-email \
--nginx \
-d 你的collabora网址 \
--redirect
打开之前创建的 Nginx 服务器块配置文件:
sudo nano /etc/nginx/sites-available/你的collabora网址.conf
修改Collabora服务器的反向代理配置内容:
listen [::]:443 ssl http2;
server_name 你的collabora网址;
ssl_certificate /etc/letsencrypt/live/你的collabora网址/fullchain.pem;
ssl_certificate_key /etc/letsencrypt/live/你的collabora网址/privkey.pem;
include /etc/letsencrypt/options-ssl-nginx.conf;
ssl_dhparam /etc/letsencrypt/ssl-dhparams.pem;
proxy_pass http://127.0.0.1:9980;
proxy_set_header Host $http_host;
location ^~ /hosting/discovery {
proxy_pass http://127.0.0.1:9980;
proxy_set_header Host $http_host;
location ^~ /hosting/capabilities {
proxy_pass http://127.0.0.1:9980;
proxy_set_header Host $http_host;
location ~ ^/cool/(.*)/ws$ {
proxy_pass http://127.0.0.1:9980;
proxy_set_header Upgrade $http_upgrade;
proxy_set_header Connection "Upgrade";
proxy_set_header Host $http_host;
proxy_read_timeout 36000s;
# download, presentation and image upload
proxy_pass http://127.0.0.1:9980;
proxy_set_header Host $http_host;
# Admin Console websocket
location ^~ /cool/adminws {
proxy_pass http://127.0.0.1:9980;
proxy_set_header Upgrade $http_upgrade;
proxy_set_header Connection "Upgrade";
proxy_set_header Host $http_host;
proxy_read_timeout 36000s;
access_log /var/log/nginx/你的collabora网址_access.log;
error_log /var/log/nginx/你的collabora网址_error.log;
server_name 你的collabora网址;
return 301 https://$server_name$request_uri;
server {
listen 443 ssl http2;
listen [::]:443 ssl http2;
server_name 你的collabora网址;
server_tokens off;
ssl_certificate /etc/letsencrypt/live/你的collabora网址/fullchain.pem;
ssl_certificate_key /etc/letsencrypt/live/你的collabora网址/privkey.pem;
include /etc/letsencrypt/options-ssl-nginx.conf;
ssl_dhparam /etc/letsencrypt/ssl-dhparams.pem;
# static files
location ^~ /browser {
proxy_pass http://127.0.0.1:9980;
proxy_set_header Host $http_host;
}
# WOPI discovery URL
location ^~ /hosting/discovery {
proxy_pass http://127.0.0.1:9980;
proxy_set_header Host $http_host;
}
# Capabilities
location ^~ /hosting/capabilities {
proxy_pass http://127.0.0.1:9980;
proxy_set_header Host $http_host;
}
# main websocket
location ~ ^/cool/(.*)/ws$ {
proxy_pass http://127.0.0.1:9980;
proxy_set_header Upgrade $http_upgrade;
proxy_set_header Connection "Upgrade";
proxy_set_header Host $http_host;
proxy_read_timeout 36000s;
}
# download, presentation and image upload
location ~ ^/(c|l)ool {
proxy_pass http://127.0.0.1:9980;
proxy_set_header Host $http_host;
}
# Admin Console websocket
location ^~ /cool/adminws {
proxy_pass http://127.0.0.1:9980;
proxy_set_header Upgrade $http_upgrade;
proxy_set_header Connection "Upgrade";
proxy_set_header Host $http_host;
proxy_read_timeout 36000s;
}
access_log /var/log/nginx/你的collabora网址_access.log;
error_log /var/log/nginx/你的collabora网址_error.log;
}
server {
listen 80;
listen [::]:80;
server_name 你的collabora网址;
server_tokens off;
return 301 https://$server_name$request_uri;
}
server {
listen 443 ssl http2;
listen [::]:443 ssl http2;
server_name 你的collabora网址;
server_tokens off;
ssl_certificate /etc/letsencrypt/live/你的collabora网址/fullchain.pem;
ssl_certificate_key /etc/letsencrypt/live/你的collabora网址/privkey.pem;
include /etc/letsencrypt/options-ssl-nginx.conf;
ssl_dhparam /etc/letsencrypt/ssl-dhparams.pem;
# static files
location ^~ /browser {
proxy_pass http://127.0.0.1:9980;
proxy_set_header Host $http_host;
}
# WOPI discovery URL
location ^~ /hosting/discovery {
proxy_pass http://127.0.0.1:9980;
proxy_set_header Host $http_host;
}
# Capabilities
location ^~ /hosting/capabilities {
proxy_pass http://127.0.0.1:9980;
proxy_set_header Host $http_host;
}
# main websocket
location ~ ^/cool/(.*)/ws$ {
proxy_pass http://127.0.0.1:9980;
proxy_set_header Upgrade $http_upgrade;
proxy_set_header Connection "Upgrade";
proxy_set_header Host $http_host;
proxy_read_timeout 36000s;
}
# download, presentation and image upload
location ~ ^/(c|l)ool {
proxy_pass http://127.0.0.1:9980;
proxy_set_header Host $http_host;
}
# Admin Console websocket
location ^~ /cool/adminws {
proxy_pass http://127.0.0.1:9980;
proxy_set_header Upgrade $http_upgrade;
proxy_set_header Connection "Upgrade";
proxy_set_header Host $http_host;
proxy_read_timeout 36000s;
}
access_log /var/log/nginx/你的collabora网址_access.log;
error_log /var/log/nginx/你的collabora网址_error.log;
}
server {
listen 80;
listen [::]:80;
server_name 你的collabora网址;
server_tokens off;
return 301 https://$server_name$request_uri;
}
重新启动 nginx 服务:
sudo systemctl restart nginx
4. 与 Nextcloud 集成
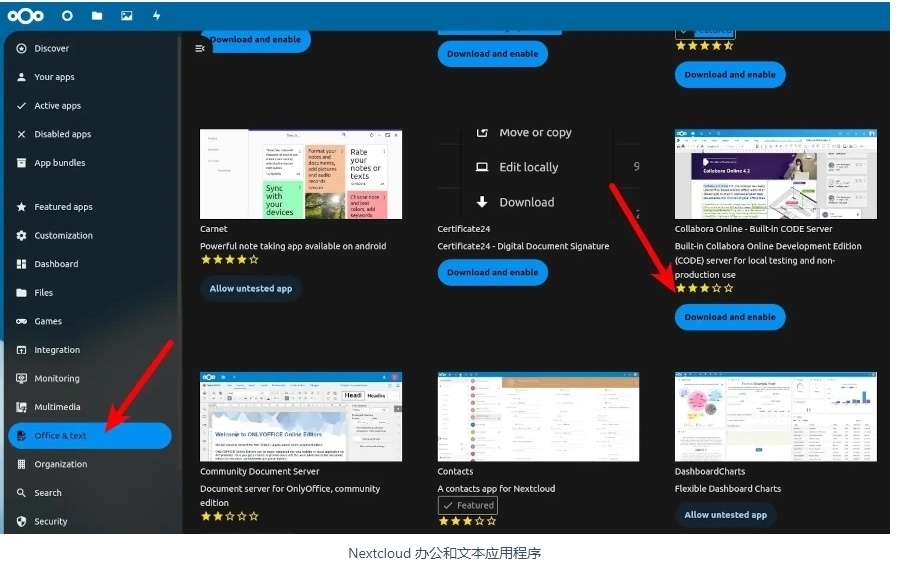
以管理员身份登录 Nextcloud,单击个人资料 > +Apps 图标。单击Office & Text菜单,然后单击下载并启用Collabora Online – 内置 CODE 服务器和Nextcloud Office。

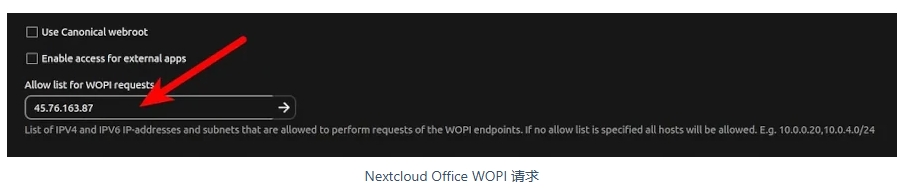
然后单击配置文件 > 管理设置 > Nextcloud Office。
选择使用您自己的服务器,在Collabora Online 服务器的 URL(和端口)中输入 CODE 子域,即你的collabora网址。

然后在WOPI 请求的允许列表中输入 Collabora Online 服务器的 IP 地址。
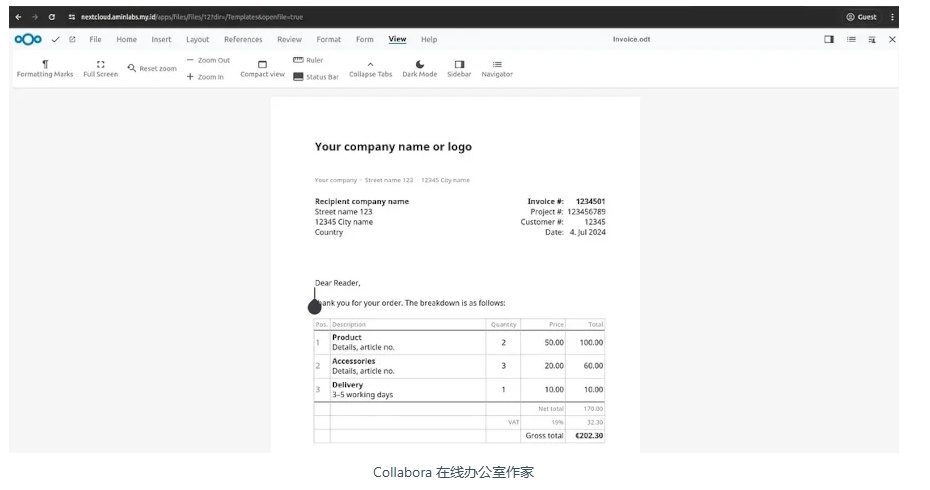
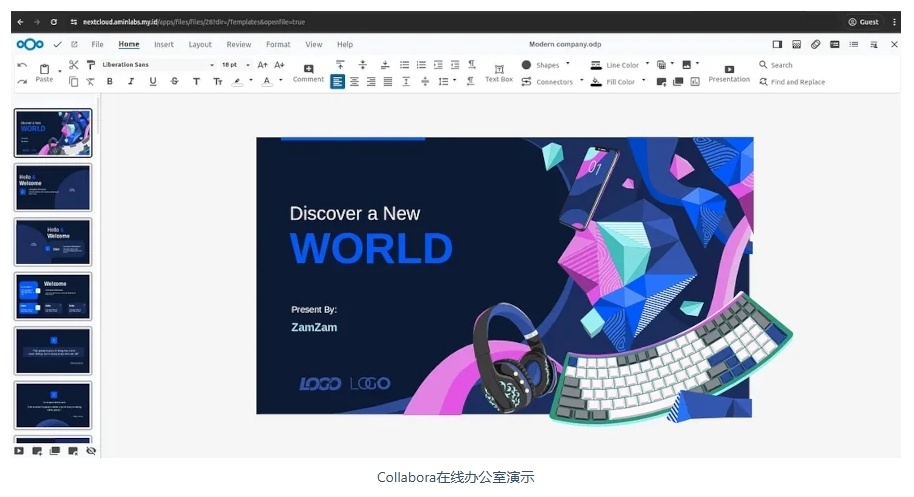
5. 测试
通过打开其中一个开放文档格式文件(例如 .odt、.ods 或 .odp)来测试 Collabora Online 与 Nextcloud 的集成。
